Building a SCIM 2.0 API Connector
Peakon supports automatic and continuous user provisioning though its SCIM 2.0 API, available to all Peakon customers. The SCIM 2.0 API allows provisioning, updating and de-provisioning of users on-demand from an external HRIS. Since SCIM is an open standard, and simple in its design, many HRISs and identity systems offer support out-of-the-box (Okta, Azure AD, Google Apps etc). In the cases where an existing HRIS does not support it, many Peakon customers have successfully developed and deployed custom SCIM API integrations with Peakon in a matter of a few weeks. The only requirement is that the source HRIS allows access to the necessary employee records through its own API.
This document outlines how to write a custom connector with the Peakon SCIM API, with the purpose of continuously updating employee information in Peakon.
Implementation
SCIM 2.0 is a standard protocol for identity management across systems, and provides a very small and simple set of REST API operations.
Obtaining an API key
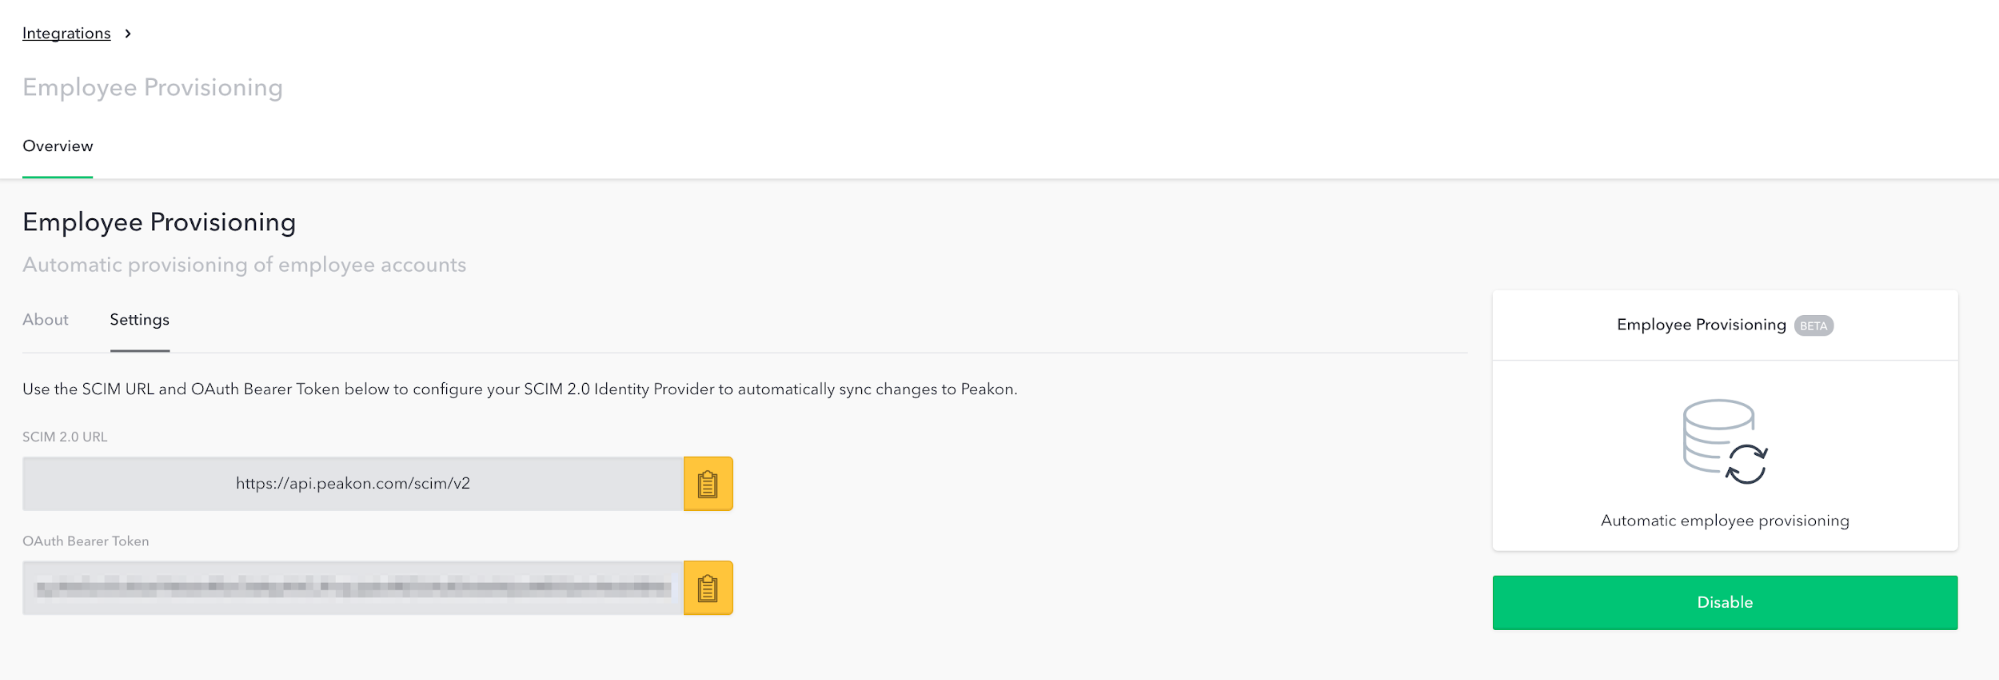
In order to make requests to the SCIM API, you need to first obtain an API bearer token by first clicking the settings icon in the bottom left corner of the Peakon dashboard, choosing Integrations, and then selecting Employee Provisioning from the list of integrations, or going directly here. Click the yellow Enable button and you’ll be taken to the page containing the API token you can see in the screenshot below.

Calling the API
The base URL for all SCIM operations in our production environment is https://{subdomain}.peakon.com/api. For access to a testing environment, please reach out [email protected].
The API relies on Bearer Token authentication, and as such the authentication token from the previous step should be provided in the Authorization header in all requests made to the API like Authorization=Bearer {api_token}.
Synchronizing employees
The first step is to decide on a shared unique identifier across the two systems. By default, this is the email address in Peakon. In the SCIM 2.0 API, the email will be represented by the userName field. Optionally, a arbitrary Employee Number string can be used instead of the email. In this example, we will use the latter.
To synchronize a single employee, the following flow of API requests are required:
- Discover: Determining if a given employee exists in Peakon
- Create (if none exist): Creating the employee with basic fields
- Update: Update the employee with all attributes data. This needs to happen separate from the creation to ensure all potential employee references exist in the system at the time the values are set.
1. Discover
To discover if the user exists in the system already, the integration should query the SCIM API through the GET /Users operation, providing a filter by Employee Number. This filter is provided by including the following filter string as a query parameter like ?filter=urn:ietf:params:scim:schemas:extension:enterprise:2.0:User eq "{Employee Number}".
Request:
GET https://SUBDOMAIN.peakon.com/api/scim/v2/Users?filter=urn%3Aietf%3Aparams%3Ascim%3Aschemas%3Aextension%3Aenterprise%3A2.0%3AUser%3AemployeeNumber+eq+%22/_**_{Employee Number}_**%22/
Response:
{
  "codes": [
    {
      "code": "{\n  \"schemas\": [\"urn:ietf:params:scim:api:messages:2.0:ListResponse\"],\n  \"totalResults\": 1,\n  \"itemsPerPage\": 50,\n  \"startIndex\": 1,\n  \"Resources\": [{\n**\"id\": \"employee_12345\",**\n    \"userName\": \"[email protected]\",\n    \"urn:ietf:params:scim:schemas:extension:enterprise:2.0:User\": {\n**\"employeeNumber\": \"{Employee Number}\"**\n    }\n  }]\n}",
      "language": "json"
    }
  ]
}
If the _Resources_array is non-empty, a user with the requested Employee Number exists in Peakon already, and you can proceed to the Update step if this guide. If not, proceed with the Create step. You need to keep the id (employee_12345) of the user for the subsequent update call.
2. Create (optional if needed)
If the user does not exist in the system, it needs to be created using a POST request. This will create the user with its basic fields; email, first name, last name, locale, timezone and employee number.
Request:
POST https://SUBDOMAIN.peakon.com/api/scim/v2/Users
{
  "schemas": [
    "urn:ietf:params:scim:schemas:core:2.0:User",
    "urn:ietf:params:scim:schemas:extension:enterprise:2.0:User",
    "urn:ietf:params:scim:schemas:extension:peakon:2.0:User"
  ],
  "userName": "[email protected]",
  "externalId": "{Unique identifier in source system}",
  "locale": "en",
  “timezone”: “America/Los_Angeles”,
  “name”: {
    familyName: “Smith”,
    givenName: “John”
  },
  “urn:ietf:params:scim:schemas:extension:enterprise:2.0:User”: {
    “employeeNumber”: “{Employee Number}”
  }
}
Response:
{
  “id”: “employee_12345”,
  “userName”: “[email protected]”,
  “urn:ietf:params:scim:schemas:extension:enterprise:2.0:User”: {
    “employeeNumber”: “{Employee Number}”
  }
}
The user is now created, and you need to keep the id (employee_12345) of the user for the subsequent update call.
3. Update
Once the user exists in the system, we will go ahead and update all Peakon attributes. For this, you need the Peakon assigned id (employee_12345) as provided by the GET or POST calls in previous steps.
Request:
PUT https://SUBDOMAIN.peakon.com/api/scim/v2/Users/employee_12345
{
  “schemas”: [
    “urn:ietf:params:scim:schemas:core:2.0:User”,
    “urn:ietf:params:scim:schemas:extension:enterprise:2.0:User”,
    “urn:ietf:params:scim:schemas:extension:peakon:2.0:User”
  ],
  “userName”: “[email protected]”,
  “externalId”: “{Optional unique identifier in source system}”,
  “locale”: “en”,
  “timezone”: “America/New_York”,
  “name”: {
    “familyName”: “Smith”,
    “givenName”: “John”
  },
  “urn:ietf:params:scim:schemas:extension:peakon:2.0:User”: {
    ”Gender”: “Male”,
    ”Team”: “Sales”,
    ”Manager”: “[email protected]”,
    ”Date of Birth”: “1970-01-01”
  }
}
Response:
{
  “id”: “employee_12345”,
  “userName”: “[email protected]”,
  “name”: {
    “familyName”: “Smith”,
    “givenName”: “John”
  },
  “urn:ietf:params:scim:schemas:extension:enterprise:2.0:User”: {
    “employeeNumber”: “{Employee Number}”
  },
  “urn:ietf:params:scim:schemas:extension:peakon:2.0:User”: {
    “Gender”: “Male”,
    “Team”: “Sales”,
    “Manager”: “[email protected]”,
    “Date of Birth”: “1970-01-01”
  }
}
At this point, the employee has been successfully updated in Peakon.
Additional documentation
Updated 3 months ago
