Getting Started with the Peakon API
In addition to standard integrations, Peakon exposes a public API allowing you to build custom applications for your own purposes.
In addition to the officially supported integrations, the Peakon APIs expose a subset of the functionality of the Peakon platform used for building custom integrations. This guide will walk you through the steps required to create a custom application for accessing the Peakon API.
Creating an application
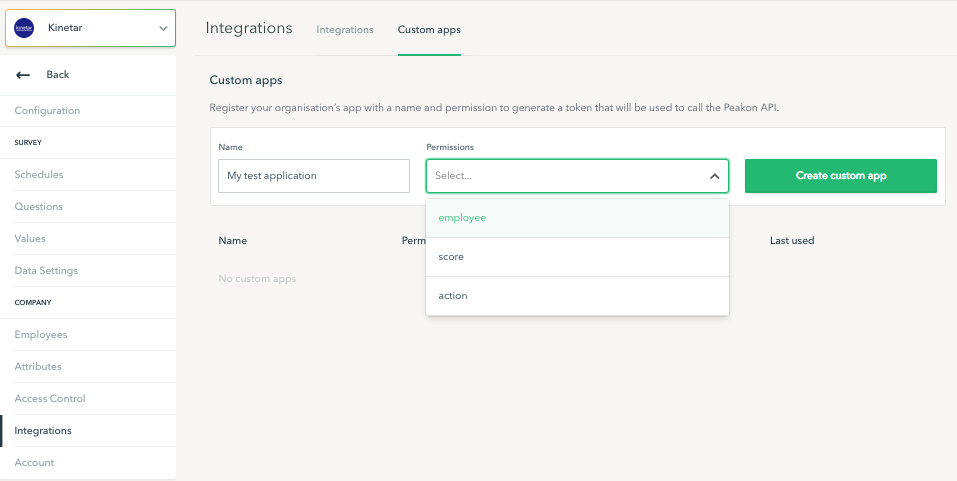
The first step is to create a custom application by going to the Custom Apps section of the Integrations page (see screenshot below). The name of your application must be unique across all your custom applications.
You will be prompted to select a set of permissions for your application. Each permission grants the application access to an area of the API, exposing different sets of data and actions.
In this example, we are going to create a simple application to retrieve the engagement overview for a given company.

Grant as few permissions as possibleAs a best practice, avoid selecting any permission beyond those needed to fulfill your use case. This helps reduce the risk of any misuse of the applications access token.
Generate and store the access token
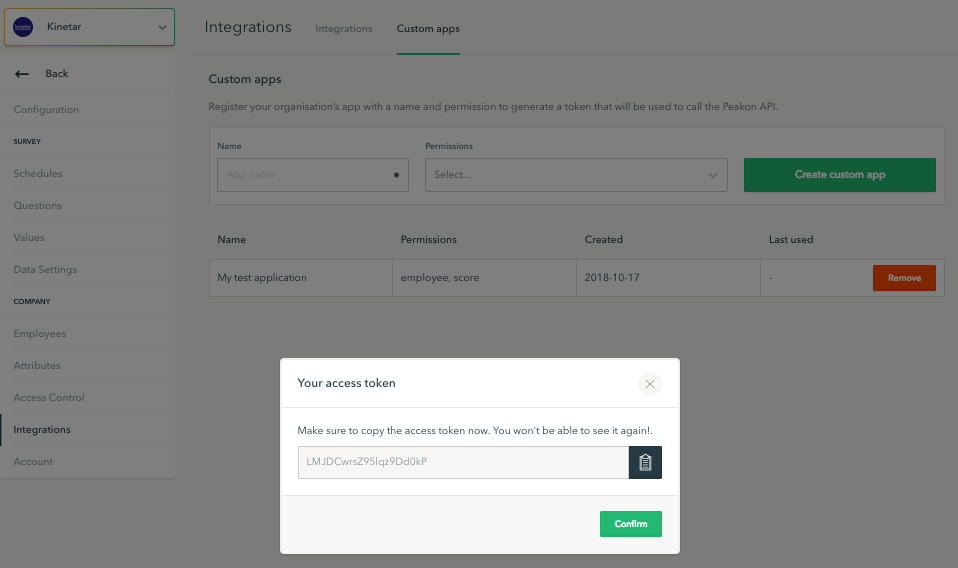
Once you have decided on a name and set of permissions for your application, click Create custom app button. As result, a modal dialog will pop up with a automatically generated access token for your application. This access token acts as the main credential for your application, and you use it to authenticate with the Peakon API to obtain a session auth token to be used for subsequent API calls.

ImportantThe access token is the credential used by your application to authenticate with the Peakon API. Therefore, treat it as a secret, keep it safe, and do not share between two different applications. Because of the sensitivity of this token, it will be displayed only once.
Updated 3 months ago
